Layout 22 - Elastic Circular Clippings

-
-
Coming Soon
InDesign + Illustrator Workflow (Affinity below ⬇️)
This tutorial demonstrates how to create a dynamic and visually appealing elastic circle clipping layout using Adobe Illustrator and InDesign. We’ll start out in Illustrator and finish off in InDesign.
Illustrator
Document setup in Illustrator
8.5 x 11 Inches in Portrait Orientation
2 Artboards
We can leave everything else as is.
Once the artboards are created, we want to drag them together using the Artboard Tool (Shift + O)
Create the Elastic Circle Effect
Select the ellipse tool (L), hold shift to draw perfect circles. Copy the circle by holding alt and dragging.
Select both circles, right-click, and choose "Make Compound Path".
Open the appearance tab (Window > Appearance).
Look for the “effects” icon near the bottom left of the Appearance Tab. It resembles a small “fx”.
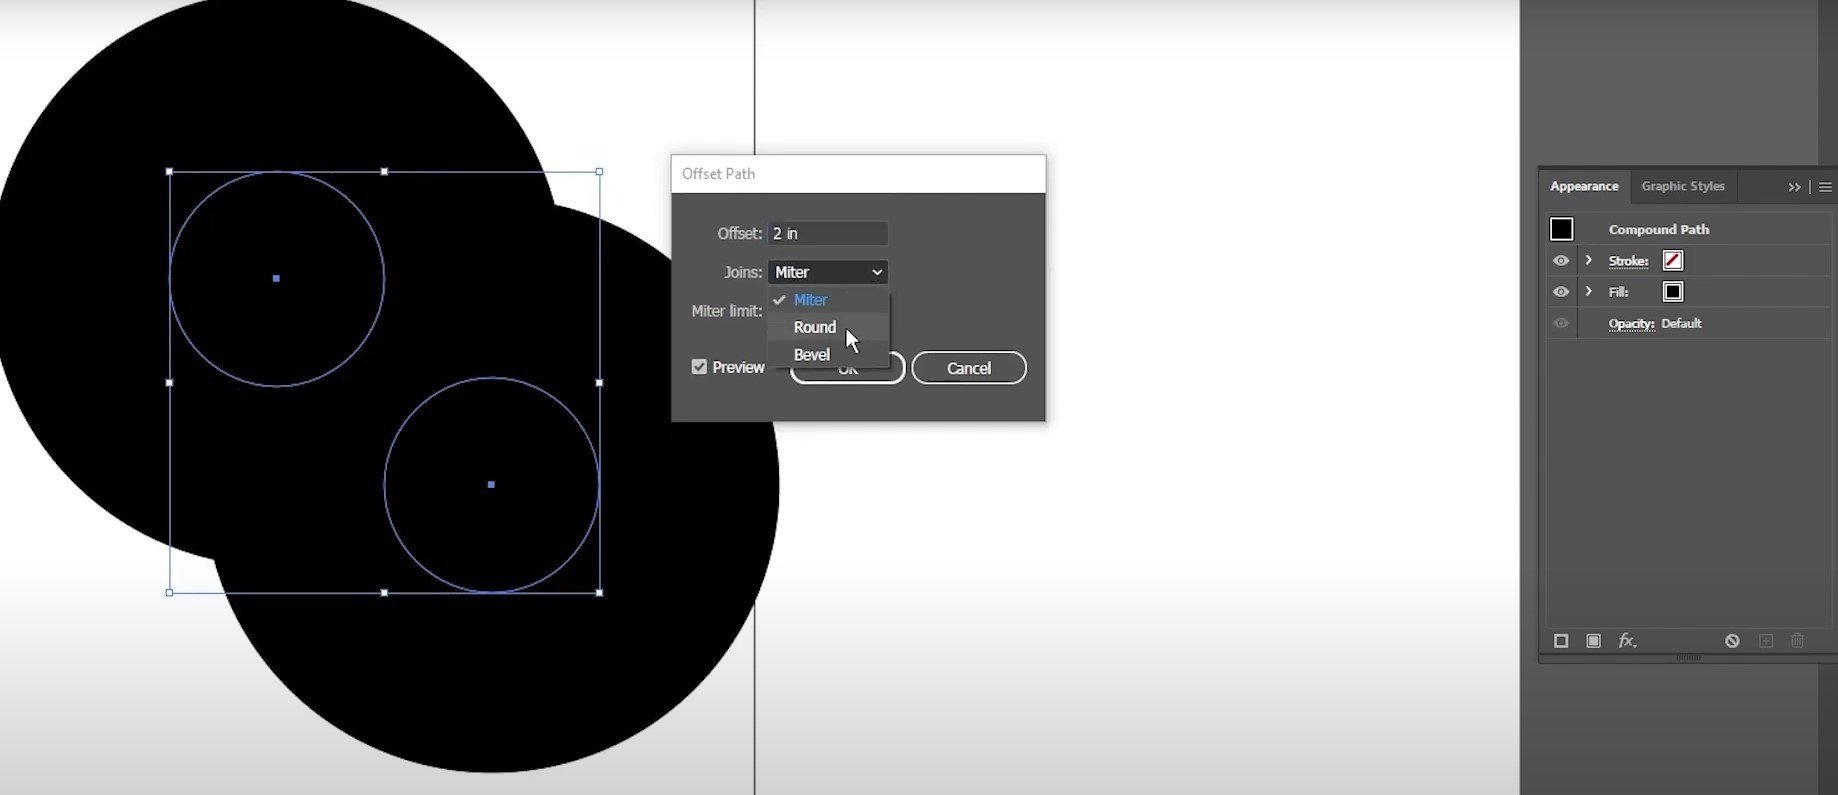
Apply the offset path effect twice (Effect > Path > Offset Path):
First offset:
Offset: 2
Joins: Round
Miter: 4
Then before we do the second one it’ll ask if you want to apply another instance of the effect.
Click “Apply New Effect”
Second Offset:
Offset: -2
Joins: Round
Miter: 4
The only difference here is the offset distance on the second effect being the negative value of the first.
Adjust Circle Sizes
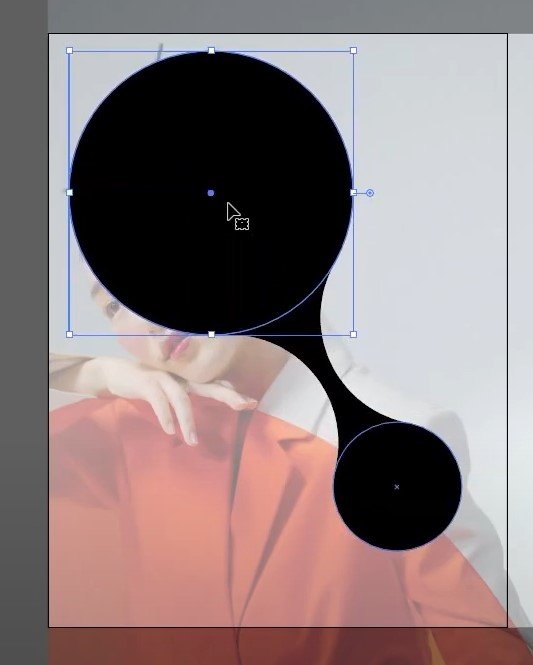
Double-click into the compound path to select the circles.
When doing this part, make sure to drag out a selection box to include the circle you want to transform.
When you see a square around your circle after you select it, you know you’re on the right track.
Move your cursor to the center of the circle and you’ll see a small icon appear beside your cursor. This is to indicate the Free Transform Tool and will allow us to drag the shapes around.
With this new free transform ability, adjust the size and position of the circles to create the elastic effect.
Prepare Image for Clipping
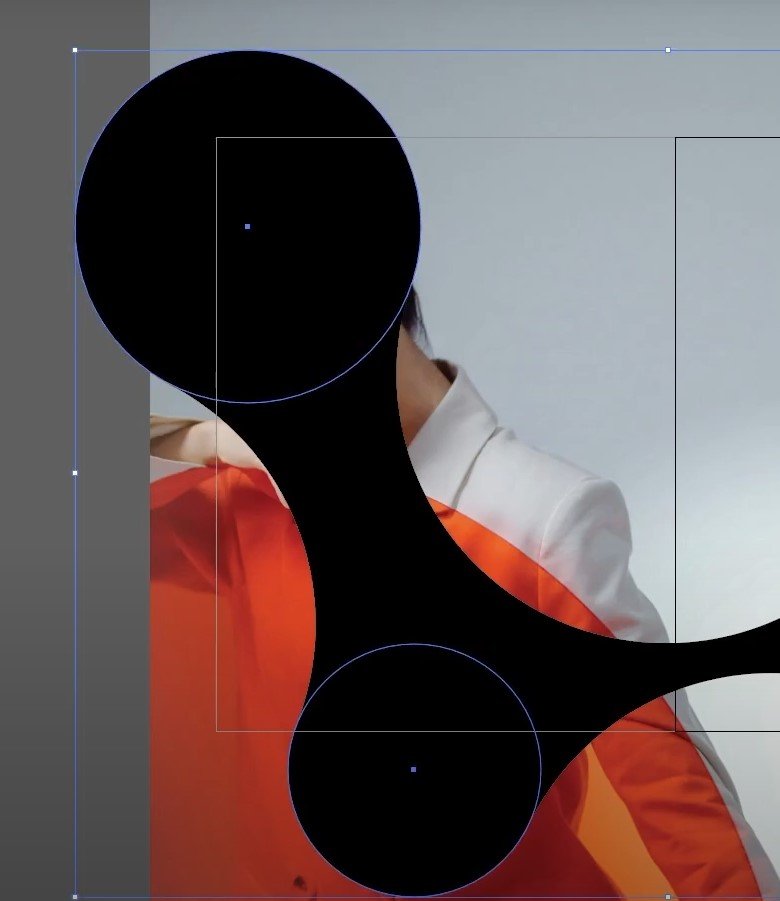
We want to get a general idea of where our main image sits in the elastic bubble shape to ensure the circles are positioned to highlight key parts of the image.
Drag and drop the image into Illustrator and position both the image and the elastic bubbles so that you get a good clipping overlay.
Modify the stroke and fill to visualize the clipping area.
Leave Illustrator open, we’ll now setup our document in InDesign.
InDesign
Document Setup in InDesign:
8.5 x 11 inches, portrait orientation with facing pages.
Pages: 2
Start #: 2
Margins: 0.625 inches
Bleed: 0.125 inches
Paste Illustrator Shape
Copy the shape we made from Illustrator and paste it into InDesign.
Adjust the size while holding shift to maintain proportions.
InDesign will treat the pasted object as a shape. As if you are drawing a new square or circle, it will behave similar to that.
Insert and Adjust Image
Drag the main image into the pasted shape and adjust it to fit proportionately.
Right Click > Fitting > Fit Frame Proportionally
Move and Resize Image: Double-click into the frame to move and resize the image as needed.
Add Additional Elements
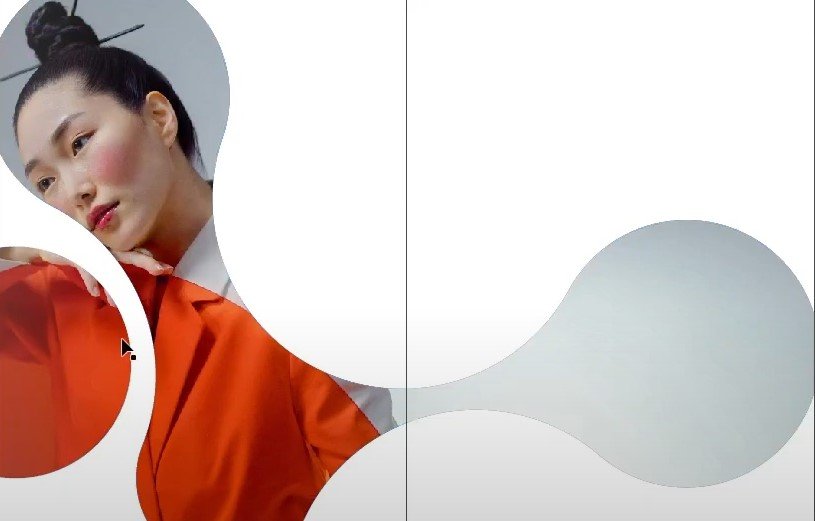
Create additional circular frames to extend the design.
We use the Ellipse Frame Tool to create additional circles that correspond with the main shape.
The Ellipse Frame Tool is accessible when you right click on the Rectangular Frame Tool (F).
In Order to maintain continuity of the image onto the new elliptical frames:
Double click into the main shaped-frame and copy the image.
Click onto the new elliptical frame and right click > paste into.
This will keep the image in the same place and will be perceived as a continuation from the main frame.
Add Text Elements
Use the type tool (T) to create a title. Adjust the font size (e.g., 72 pt) and position it.
Create body text with a smaller font size (e.g., 12 pt).
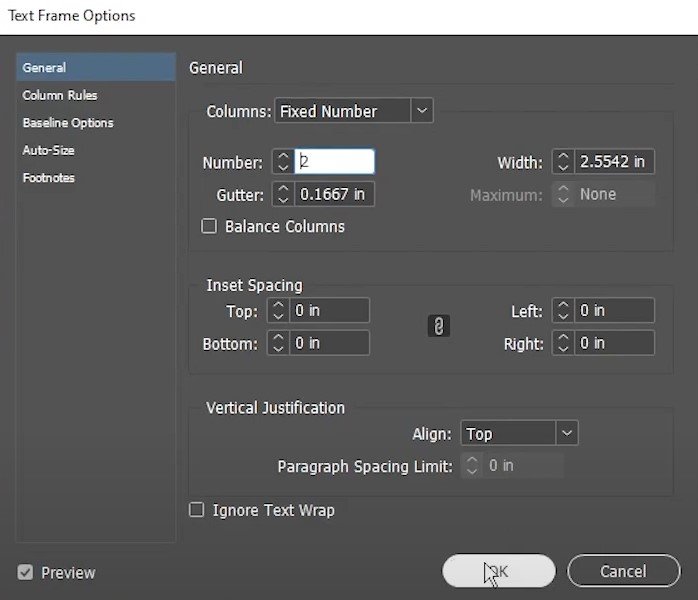
Use two columns for a clean layout (Right Click on Text Frame > Text Frame Options > Number of Columns > 2).
Select the main elastic circle shape and apply text wrap
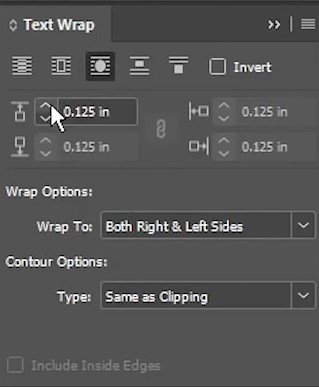
Make sure Text Wrap tab is open. Window > Text Wrap > Wrap around object shape (Third icon from the left)
Adjust the offset to add space between text and the shape.
Fine-tuning
Here I see an empty space on my right spread and would like to populate it with a quoted text.
Drag out a text box with Type Tool (T).
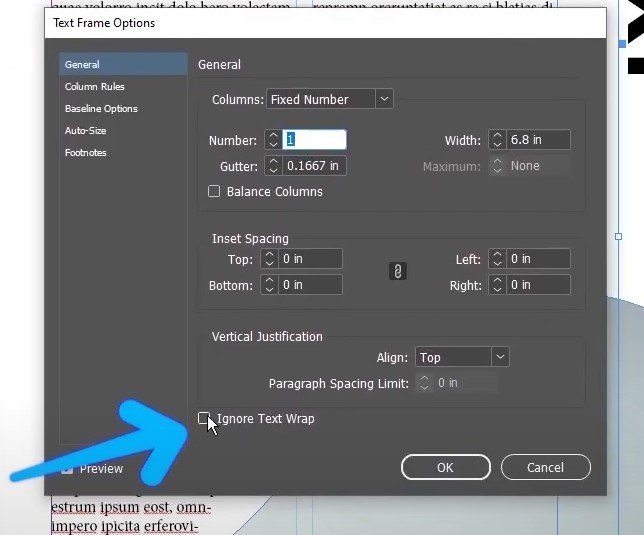
Since this new text box will be inside the object with a text wrap, we’ll need to override it by right clicking on the text frame, Text Frame Options > Check the box for Ignore Text Wrap.
I also adjust the color of my page to give it some extra punch.
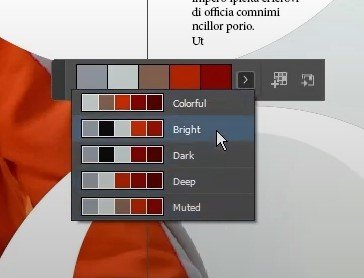
Use the color theme tool (Shift + I) to sample colors from the main image.
Apply them to text and background elements for cohesive design. Here are some of the things I did:
Drag out a Rectangle Tool (M) to use this color as the background.
Changed the color of important text elements such as titles and quotes to this color.
And that’s it! Honestly this one is a lot harder than some of the other ones so if you made it all the way to the end then give yourself a round of applause!
Affinity Workflow
This tutorial demonstrates how to create a dynamic and visually appealing elastic circle clipping layout using Adobe Illustrator and InDesign. We’ll start out in Illustrator and finish off in InDesign.
Vector
Document setup in Illustrator
Create a new document in Affinity (File > New).
8.5 x 11 Inches in Portrait Orientation
2 Pages
We can leave everything else as is.
Once the document is created, make sure you are working in the Vector Studio so we can create the circle shapes first.
Create the Circle / Blob Effect
Select the Ellipse Tool (M), hold shift to draw a perfect circle.
Copy the circle by holding Alt and dragging.
Create a few circles and position them so that they are slightly touching each other.
Once you have your circles in place, select all of them with the Move Tool (V).
Go to Geometry > Compound > Add.
This will connect the circles together while still keeping the individual circle shapes editable inside the compound shape.
Create the Offset Effect
With the compound shape selected, select the Contour Tool (O).
The Contour Tool works similarly to Offset Path in Illustrator.
Change the contour value to a negative value in the context toolbar at the top.
For example:
Contour: -0.5 in
Join: Round
This will create the inner offset effect and start giving the circles that connected, elastic shape.
You can test different contour values depending on the size of your circles and the effect you want.
For this layout, keep the join style rounded so the shape stays soft and organic.
Adjust Circle Sizes
Double-click into the compound shape using the Move Tool (V) to access the individual circles.
From here, you can adjust the size and position of each circle.
Try resizing and moving the circles until you get a shape that feels close to the original layout.
One thing to note is that Affinity does not create the exact same smooth elastic pull as Illustrator. In Illustrator, the offset path effect creates a smoother “string pull” between the circles.
In Affinity, the connection can sometimes get thinner or less smooth depending on how far apart the circles are. Because of that, try keeping the circles fairly close together so the joints don’t become too thin.
Prepare the Image for Clipping
Once the blob shape is created, bring in the image you want to use for the layout (File > Place).
Position the image on the canvas and scale it using the Move Tool (V) so the important parts of the image sit inside the circle areas.
For example, if you are using a portrait image, make sure the face or main subject is positioned inside one of the larger circles.
Once the image is in the right place, drag the compound shape over the image in the Layers panel (Window > Layers) to use it as a mask. This should clip the image into the custom blob shape.
Add Additional Circle Shapes
In the original layout, there are also a few smaller circle image frames near the bottom of the composition.
To recreate this, create additional circle shapes using the Ellipse Tool (M).
Hold shift while dragging to keep them as perfect circles.
Position them near the bottom of the layout to help balance the composition.
You can either use the same image inside these circles or duplicate the image layer and mask it into each circle.
To duplicate the image or shape, select the object with the Move Tool (V), then hold Alt and drag.
This helps make the image feel like it continues through the layout.
Add the Background
Once the image and circle masks are in place, create a rectangle using the Rectangle Tool (M).
Drag the rectangle across the page to create a background color block.
Use the Colour Picker Tool / Eyedropper Tool (I) to sample a color directly from the image.
This helps the layout feel more cohesive because the background color is pulled from the actual photo.
Move the rectangle behind the image and circle shapes in the Layers panel (Window > Layers).
You can also right-click the rectangle and move it to the back (Arrange > Move to Back)
Layout
Add the Typography
Switch back to the Layout tools.
Use the Frame Text Tool (T) to create the main title.
For this layout, the title is rotated vertically along the left side of the spread.
Adjust the font, size, tracking, and color in the Character panel (Window > Text > Character).
You can also adjust these settings in the context toolbar at the top when the text is selected.
You can rotate the text using the Move Tool (V) by hovering near the corner of the text frame until the rotate icon appears.
You can also rotate the text using the Transform panel (Window > Transform).
You can add a small caption or subtitle underneath the title using the Frame Text Tool (T).
Use the same color palette from the image so the text feels connected to the overall layout.
Add Body Text and Text Wrap
Create a text frame on the right side of the spread using the Frame Text Tool (T).
Add your body text or placeholder text.
Select the main blob image shape using the Move Tool (V).
Open the Text Wrap settings (Text > Show Text Wrap Settings).
Choose a tight text wrap so the body text wraps around the organic circle shape.
Adjust the distance / offset in the Text Wrap panel until there is enough space between the text and the image.
This is what gives the layout that magazine-style interaction between image and text.
The Affinity version may not recreate the Illustrator effect 100% perfectly, but you can get very close by using compound shapes, the Contour Tool (O), image masking, and text wrap (Text > Show Text Wrap Settings).